Guardia di Finanza
Insieme per la Legalità
Attenzione!!!
E’ stata rilevata attività illegale, il sistema è stata bloccata per una violenza delle Leggi della Repubblica Italiana.
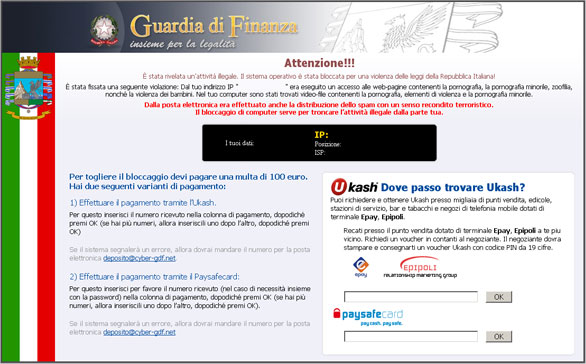
This malware is distributed through drive-by downloads and social engineering tricks. Once again the Blackhole Exploit Kit is involved. This commercial crimeware kit checks a computer for the presence of software vulnerabilities on the system, including CVE-2010-0186, CVE-2011-2110 and several others. These are already know vulnerabilities, so keeping your software (especially Java and Adobe) will significantly reduce chances of infection. Once installed, the virus locks your computer and displays a scam message (see image above). It then goes on to ask for a payment of €100 within 24 hours over Ukash or Paysafecard; otherwise your computer will be wiped clean. However, it's not capable of doing this stuff. The bad news is however that this malware may download and install spyware modules on your computer. We came up with at least several variants of Guardia di Finanza ransomware which upon execution requests malicious files from the Internet.
If your computer is infected with this virus, do not follow the instructions on screen. Please follow the steps in the removal guide below to remove Guardia di Finanza ransomware from your computer. Please note, we've analyzed a variant of this malware which replaces Explorer.exe file. If you got infected with other variant, our removal guide may not work for you. If you need extra help removing this malware, please leave a comment below. Good luck and be safe online!
Guardia di Finanza malware removal instructions:
1. Reboot your computer is "Safe Mode with Command Prompt". As the computer is booting tap the "F8 key" continuously which should bring up the "Windows Advanced Options Menu" as shown below. Use your arrow keys to move to "Safe Mode with Command Prompt" and press Enter key. Login as the same user you were previously logged in with in the normal Windows mode. Read more detailed instructions here: http://www.computerhope.com/issues/chsafe.htm

2. When Windows loads, the Windows command prompt will show up as show in the image below. At the command prompt, type regedit and press Enter. The Registry Editor opens.

3. Locate the following registry entry:
HKEY_LOCAL_MACHINE\SOFTWARE\Microsoft\Windows NT\CurrentVersion\Winlogon\
In the righthand pane select the registry key named Shell. Right click on this registry key and choose Modify.
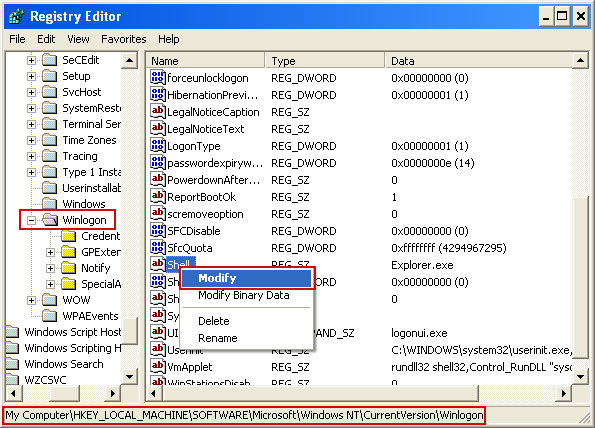
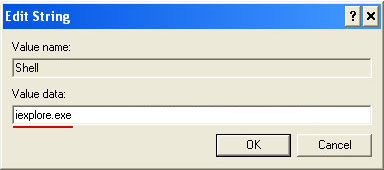
Default value is Explorer.exe.

Change value data to iexplore.exe. Click OK to save your changes and exit the Registry editor.
Go back into "Normal Mode". To restart your computer, at the command prompt, type shutdown /r /t 0 and press Enter.

4. When Windows loads, there will be no icons. Don't worry, we will fix this soon. First, press Ctrl+Alt+Del or Ctrl+Shift+Esc and fire up Task Manager. Click File → New Task (Run...)
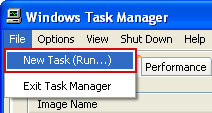
Type in iexplorer and click OK or press Enter.
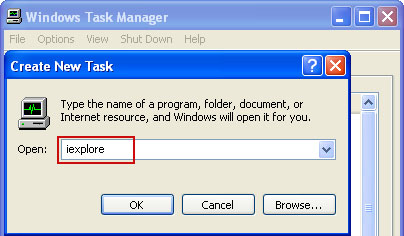
5. Now, you need to download clean explore.exe file and over-write the infected one. Please make sure you download the file for your version of Windows:
Click on the link to download the file. Choose Save. Then browse to C:\Windows folder and select existing explorer.exe file. Click Save to over-write the malicious explorer.exe file.
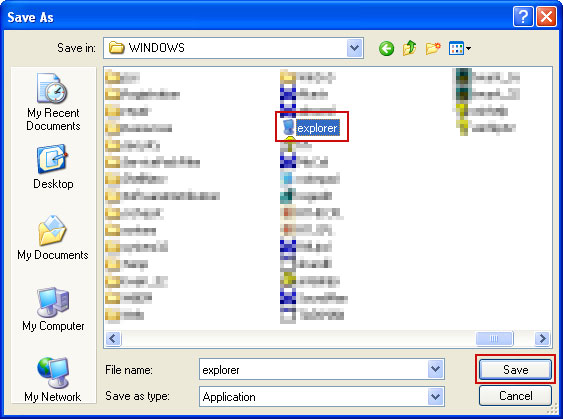
6. Open up Task Manager once again. Click File → New Task (Run...) as you previously did. Type in regedit and click OK to open Registry Editor.
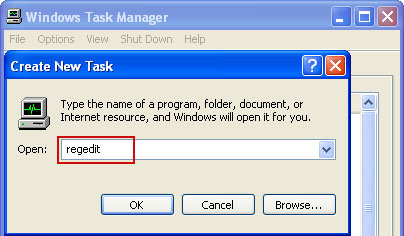
Locate the same registry entry outlined in step 3 of this removal guide.
HKEY_LOCAL_MACHINE\SOFTWARE\Microsoft\Windows NT\CurrentVersion\Winlogon\
In the righthand pane select the registry key named Shell. Right click on this registry key and choose Modify. Delete iexplore.exe and type in Explorer.exe as it was before. Click OK to save changes.

Close Registry Editor and restart your computer. That's it! I hope this helps! Don't forget to scan your computer with anti-malware software.
If your computer is still infected, please follow an alternate ransomware removal guide.
To learn more about ransomware, please read Remove Trojan.Ransomware (Uninstall Guide).


0 comments:
Post a Comment